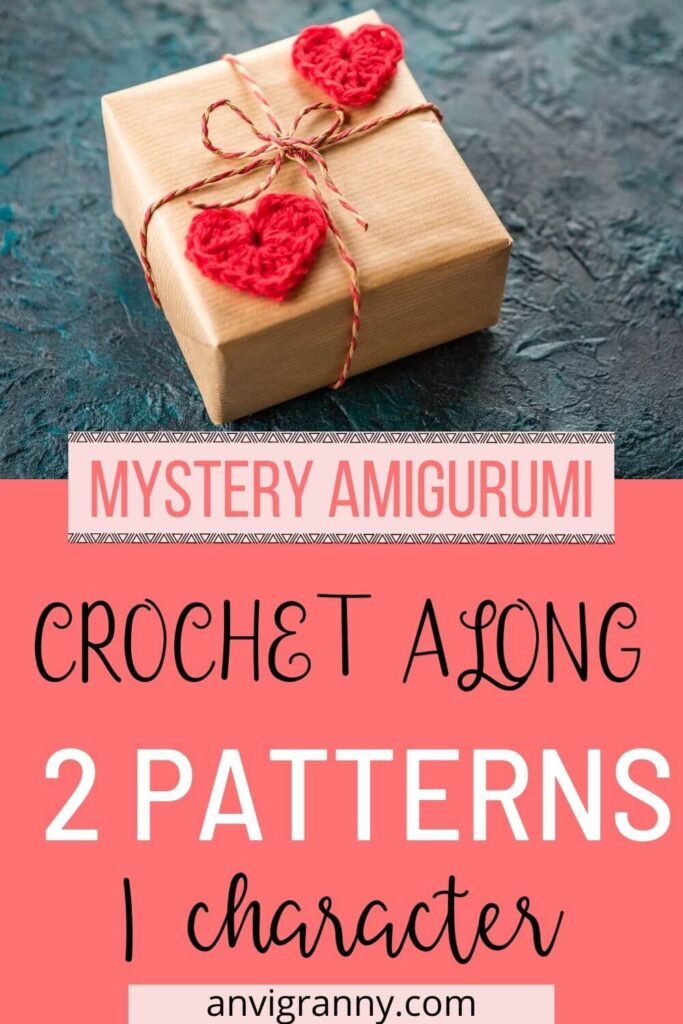
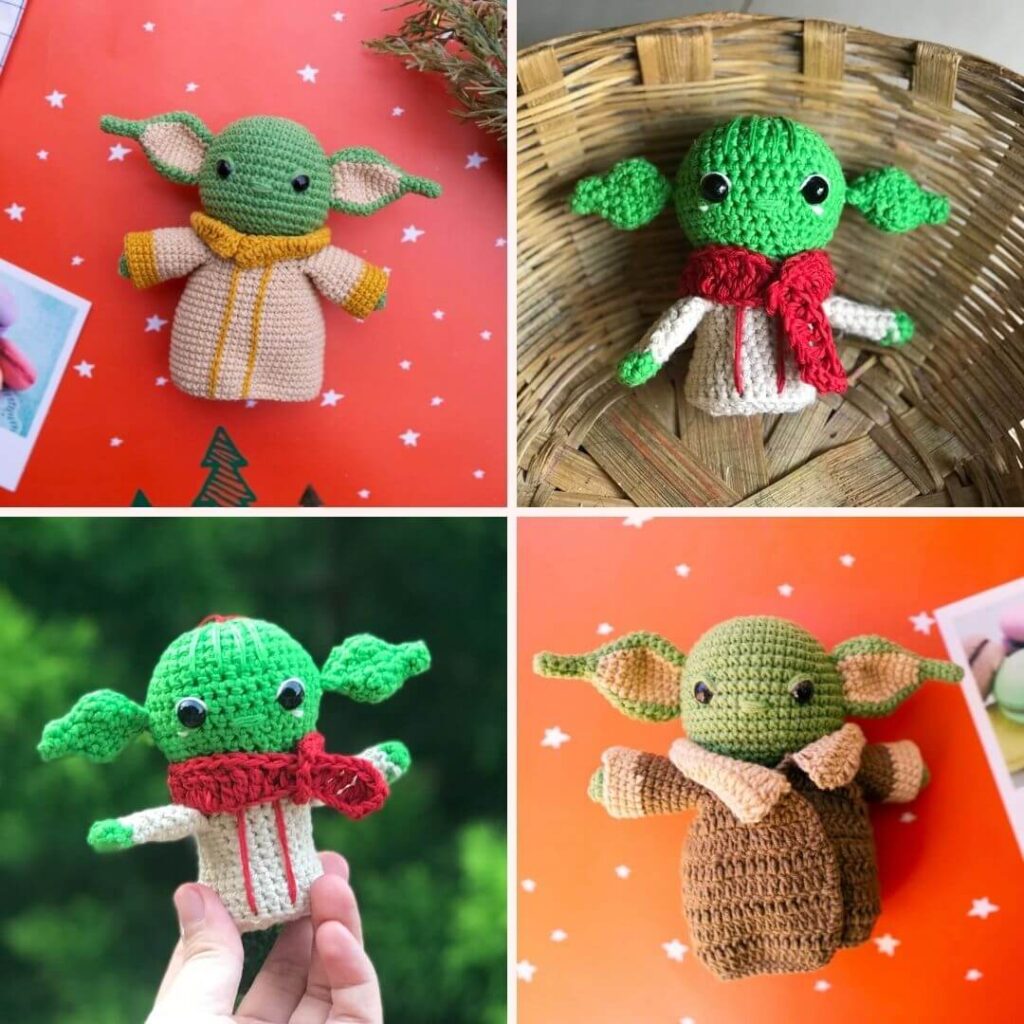
The character is Baby Yoda Amigurumi, the Christmas version, and the normal version. You can get here Baby Yoda Amigurumi free patterns.
Wanna follow us? Find the links below
ANVI’S GRANNY HANDICRAFTS
MEOW AMIGURUMI
Are you ready for having fun?
STITCHES YOU`LL NEED TO KNOW:
The pattern is easy to intermediate skill level. You need to know chain stitch, slip stitch, single crochet, half double crochet, double crochet (US term). If you are a beginner, just check out my Ultimate Guide to amigurumi for beginners and you will know all soon.
MATERIALS AND TOOLS
ANVI’S GRANNY HANDICRAFTS
Amigurumi Cotton yarn (1mm), I used double strands equal to DK yarn: green, light brown, red
2.5mm crochet hook
1 pair of 7mm safety eyes
Yarn needle
Scissors
Polyfill
Stitch marker (or another piece of yarn in different color)
Embroidery thread
MEOW AMIGURUMI
YarnArt Jeans beige 07
YarnArt Jeans green 69
YarnArt Jeans yellow 84
YarnArt Jeans brown 40
1 pair of 10,5 mm safety eyes
Toy filling
2 mm crochet hook
ABBREVIATIONS
Because we are gonna crochet 2 patterns from me and Janie, so we will have 2 systems of abbreviations (Don’t worry, it easy to catch up). If you are new to amigurumi, check out my Ultimate Guide to Amigurumi for beginners and you will be all ok.
ANVI’S GRANNY HANDICRAFTS
MR: magic ring
CH: chain
X: Single crochet
F: double crochet
V: Increase (make 2 stitches from 1 stitch)
A: Decrease (make 1 stitch from 2 stitches)
SS: slip stitch
FO: Fasten off
BLO: Back loop only
FLO: Front loop only
St/Sts: Stitch/Stitches
MEOW AMIGURUMI
ch: chain
sts: stitch(es)
sl st: slip stitch
sc: single crochet
dc: double crochet
inc: increase
dec : decrease
hdc: half double crochet fo: fasten off
FLO : Front loop only
BLO : Back loop only
rep: repeat (number): number of stitches in the round or stripe
PART 1: EARS AND ARMS
ANVI’S GRANNY HANDICRAFTS
MEOW AMIGURUMI
EARS (Make 2) Green yarn
1)MR 5X (5)
2-3) 5X (5)
4) 5V (10)
5) (X, V)*5 (15)
6) 15X (15)
7) (X, A)*5 (10)
8) 5A (5)
9) Fold in half and crochet 2 opposite sts together 2X, (2)
FO, hide the yarn tail
EARS (Make 2) Start with green yarn. The bold text means that you’ll use the beige yarn.
Row 1: 5sc in MR (5)
Row 2- Row 4: 5sc (5)
Row 5: (4sc, 1inc) (6)
Row 6: (1sc, 1inc) * 3 (9)
Row 7: (2sc, 1inc), (2sc, 1inc) , (2sc, 1inc) (12)
Row 8: (3sc, 1inc) (3sc, 1inc) (3sc, 1inc) (15)
Row 9: 5sc, 5sc, 5sc (15)
Row 10: (4sc, 1inc) ,(4sc, 1inc), (4sc, 1inc) (18)
Row 11: (2sc, 1inc) * 2, (2sc, 1inc) * 2 , (2sc, 1inc) * 2 (24)
Row 12 – Row 13: 8sc, 8sc, 8sc (24)
Row 14: (2sc, 1dec) * 2, (2sc, 1dec) * 2 , (2sc, 1dec) * 2 (18)
Row 15: 6sc, 6sc, 6sc (18)
Row 16: (1sc, 1dec) * 2, (1sc, 1dec) * 2, (1sc, 1dec) * 2, (12)
Cut the thread leaving enough length for sewing. Don’t stuff the ear
ARMS (MAKE 2) Green yarn
1) MR 7X (7)
2) 7X (7)
Change to brown yarn
3-8) 7X (7)
Do not stuff
9) Fold in half and crochet 2 opposite sts together 3X, (3)
FO. Hide the yarn tail
ARMS (Make 2) Green yarn
Row 1: 5 sc in the magic ring (5)
Row 2: 5 inc (10)
Row 3 – Row 14: 10 sc (10)
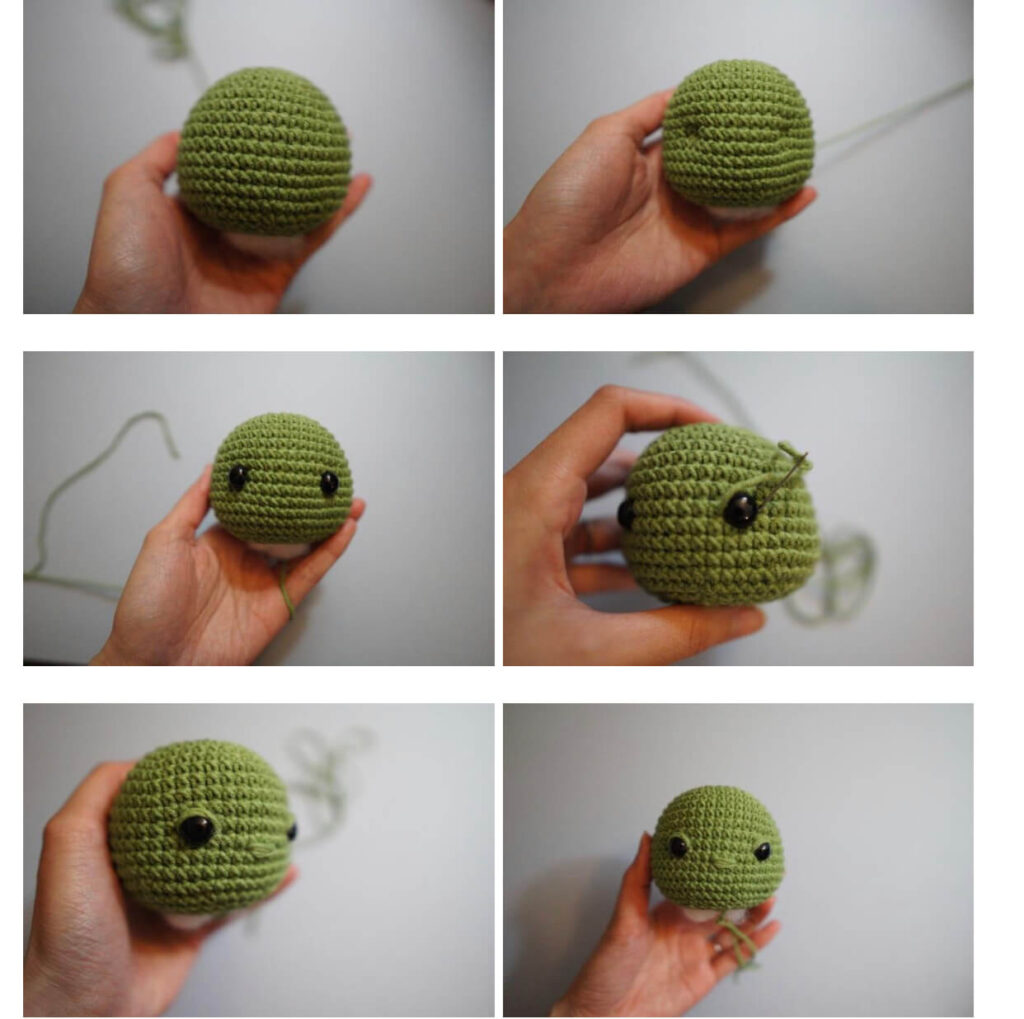
PART 2: HEADS
ANVI’S GRANNY HANDICRAFTS
MEOW AMIGURUMI
Green yarn
1) MR 6X (6)
2) 6V (12)
3(X, V)*6 (18)
4) (2X, V)*6 (24)
5) (3X, V)*6 (30)
6) (4X, V)*6 (36)
7-8) 36X (36)
We are adding ears in the next step,
9) 8X, 2X (through both sts of body and ear), 16X, 2X (through both sts of body and ear), 8X (36)
10-11) 36X (36)
12) (4X, A)*6 (30)
13) (3X, A)*6 (24)
14) (2X, A)*6 (18)
Insert safety eyes at rows 9-10, 7sts apart.
Cut the yarn, change to brown yarn to crochet the body
| Use the green yarn R1: Cast on 6 sc in the magic ring(6) R2: 6 inc(12) R3: (1sc, 1inc)*6 (18) R4: (2sc,1inc)*6 (24) R5: (3sc,1inc)*6(30) R6: (4sc,1inc)*6 (36) R7: (11sc, 1inc)*3 (39) R8: (12sc 1inc)*3 (42) R9: 42sc (42) R10: (13sc, 1inc)*3 (45) R11 – R13: 45 sc (45) R14: 9 sc, 3inc, 21sc, 3inc, 9sc (51) R15 : 51 sc (51) R16 : (15sc, 1dec)* 3 (48) R17: (2sc, 1dec, 2sc)*8 (40) R18: ( 3sc, 1dec)* 8 (32) R19: (1sc, 1dec, 1sc)*8 (24) R20: (1sc, 1 dec, 1sc) * 6 (18) Cut the thread leaving enough length for sewing. Stuffing well with the fiberfill. Make eye sockets, place the safety eyes between row 12 and 13 at about 10 sts apart. Embroider the nose between row 13 and 14 |
PART 3: BODY
ANVI’S GRANNY HANDICRAFTS
MEOW AMIGURUMI
Brown yarn
1) 18X (18)
2) (2X, V)*6 (24)
3) 6X, 3X (through both sts of body and arms), 6X, 3X (through both sts of body and arms), 6X (24)
4-6) 24X (24)
7) (3X, V)*6 (30)
8-10) 30X (30)
11) BLO 30X (30)
12) (3X, A)*6 (24)
13) (2X, A)*6 (18)
14) (X, A)*6 (12)
Stuff properly the head and decently the body (not too much)
15) 6A (6)
FO. Use the needle to close the opening.
| LEGS (Make 2) Use green yarn Row 1: Cast on 8 sc in the magic ring (8) Row 2: 8 inc (16) Row 3: 16 sc (16) Row 4- Row 5: 16 sc (16) Cut and secure the thread. Make the other leg but don’t cut the thread and continue working the body BODY Row 1: sc in the following 16 sts of the second leg, Chain 5 and join with the first leg, sc in the following 16 sts of the first leg, 5 sc in 5ch, place a stitch marker in the last sts [42] Row 2: ( 6sc, 1inc) *6 (48) Row 3 – Row 7: 48 sc (48) Row 8: ( 6sc, 1 dec ) * 6 (42) Row 9: 42 sc Row 10: ( 6 sc, 1dec, 6sc)*3 (39) Row 11: 39 sc (39) Row 12: ( 11sc, 1dec)*3 (36) Row 13: 36 sc (36) Row 14: (5sc, 1dec, 5sc) * 3 (33) Row 15: 33 sc (33) Row 16: (9sc, 1dec) * 3 (30) Row 17: ( 3sc, 1dec) *6 (24) Row 18: (1sc, 1dec, 1sc) * 6 ( 18) Cut and secure the thread. Leaving a long tail. |
PART 4: OUTFIT AND ASSEMBLING
ANVI’S GRANNY HANDICRAFTS
MEOW AMIGURUMI
It is a no sew pattern, so no work for this part, are you happy?
Just decorate a bit with the head with yarn.
SCARF Red yarn
38CH, crochet at the 4th loop from hook 34E. FO. Hide the yarn tail.
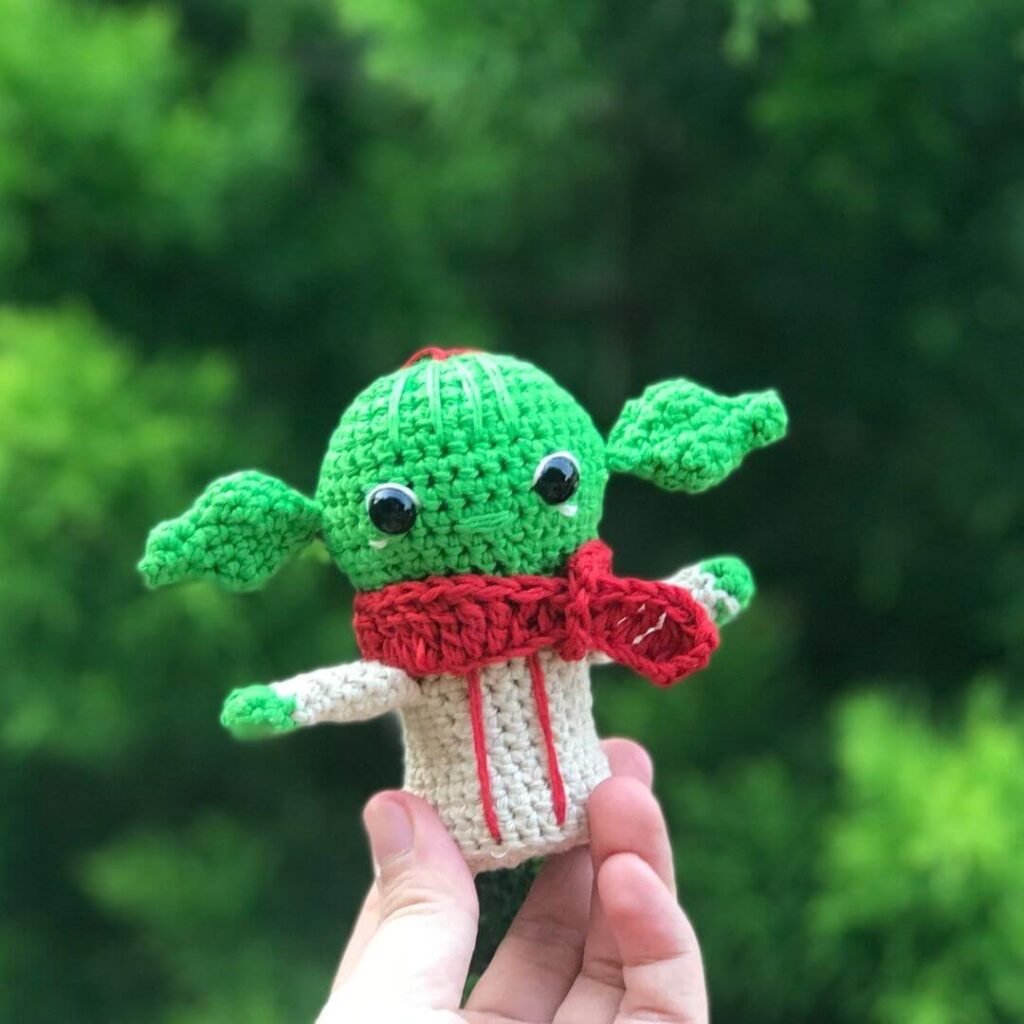
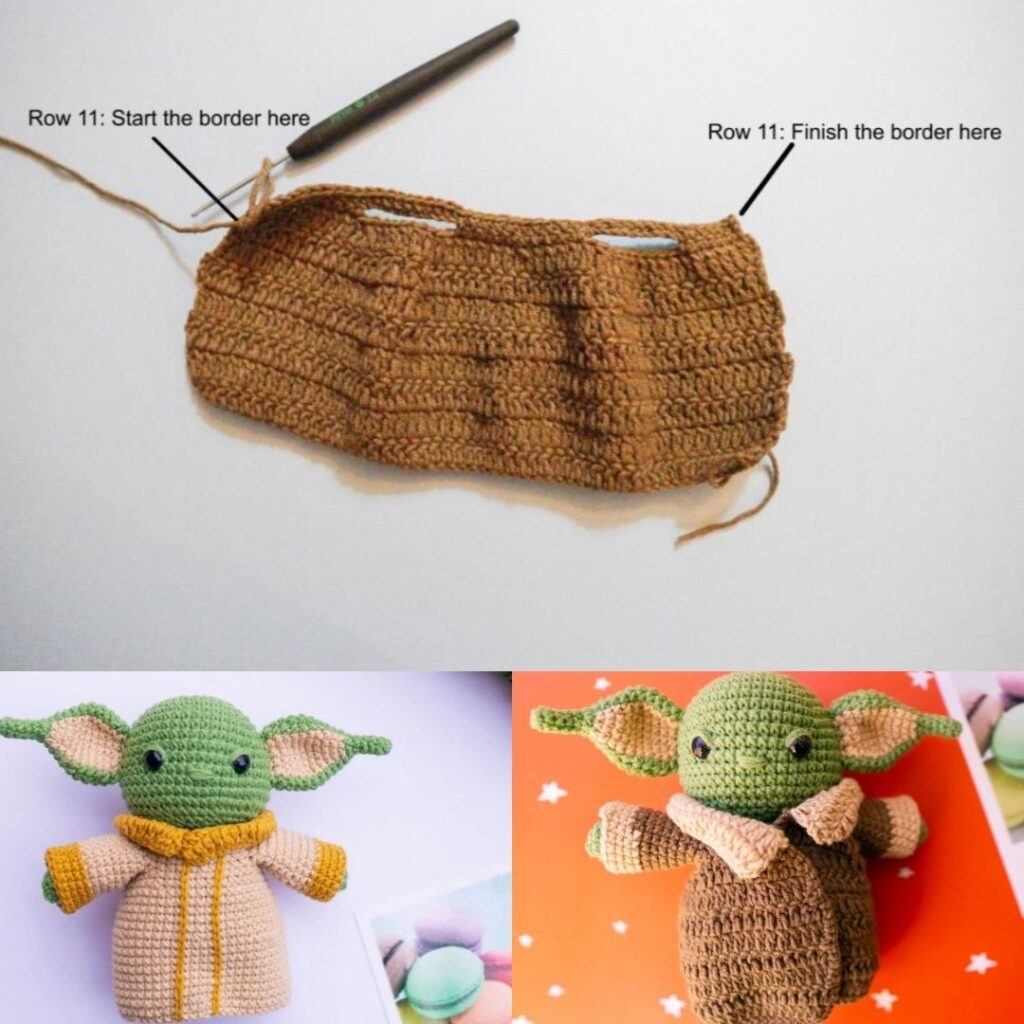
| Sew the ear to the head between row 8 and 15. Sew the head to the body. Sew the arms between rounds 16 and 17 of the body. SWEATER Use beige yarn Chain 55, join by 1 stst (54) Row 1 – Row 10: 54 sc (54) Row 11: ( 7sc, 1dec) * 6 (48) Row 12 – Row 16: 48 sc (48) Row 17: (3sc, 1 dec, 3sc ) * 6 (42) Row 18: 42 sc (42) Row 19: 6sc, 10ch, skip 10sts, 10sc, 10ch, skip 10st, 6 sc (42) Row 20 – Row 21: 42 sc (42) Cut and secure the yarn. Sleeves (Make 2) Use beige yarn. Insert 1 sc (count as sc) pick up 19 around (20) Row 1 – Row 8: 20 sc (20) Change the yellow yarn Row 9 – Row 12: 20 sc (20) Cut and secure the thread. Collar Use yellow yarn Insert 1 sc in the 23th st of row 21, 42 sc, chain 3, turn back (45) Row 1: 3ch, 45 DC, turn back (45) Row 2: 3 ch, (2DC in the same st, 8 DC) * 5, turn back (50) Cut and secure the yarn. Sew the corner of the collar to row 21 of the sweater. With yellow yarn, vertically down the middle of the sweater, chain 21 (Make 2 times) COAT Use brown yarn Row 1: Chain 57, 54 DC, turn back (54) Row 2 – Row 5: ch3, 54 DC, turn back (54) Row 6: ch3, (7DC, 2 DC together) * 6, turn back (48) Row 7: ch3, 48 DC, turn back (48) Row 8: ch3 ( 6DC, 2 DC together) * 6, turn back (42) Row 9: 6sc, ch 10, sk 10st, 10sc, ch10, sk 10 st, 6 sc, turn back (42) Row 10: 42 sc, don’t turn back, and continue working (42) Row 11: 84 sc to make the border of the coat, finish by 1 slst (84) Cut the yarn. COLLAR Use the beige yarn insert 1 sc in the last st of row 10 of the coat. Keep the works facing you like in the picture: Row 1: ch3, 2 DC in same st, 20 DC, 2 DC in same st, 19 DC, 2 DC in same st, turn back (45) Row 2: ch 3, (8DC, 2 DC in same st) * 5, turn back (50) Row 3: ch 3, 50 DC (50) Cut the yarn Sleeves (Make 2) Use brown yarn Insert 1 sc (count as sc) pick up 19 around (20) Row 1 – Row 8: 20 sc (20) Change the beige yarn Row 9 – Row 12: 20 sc (20) Cut and secure the thread. |
DO FINISH 2 FIRST STEPs TO ENTER THE GIVEAWAYS, AND SHARE YOUR CROCHET WITH US!
- Sign up to the MACAL (so that I know how many of you are there joining us)
- Follow me @anvisgranny and Janie @meow.amigurumi on Instagram and SUBSCRIBE to both of our Youtube channels (Links are above)
- During the crochet along, share your pictures of your progress and finished dolls, tagging us @anvisgranny and @meow.amigurumi on IG using hashtag #MACAL or #AGmacal
Each photo shared (must be different pictures) will be an entry into the prize. If you cannot catch up on the parts, simply post your finished amigurumi no later than Saturday, 21st November at midnight EST.
Congratulations! We have done the MACAL. See you again at the next event